
Installing Travertine Tile in My Office!
4:22 PM
Who's surprised that Chris and I started (and completed) another project that wasn't even on our previous post of "Current Projects"??... any one?? any one?? Bueller?? Yea, didnt think so...
So back a couple weeks ago, Chris and I went to a marble and tile auction (as remembered HERE) and bought some AWESOME 3x6 travertine tiles...


Here is what it looked like from in the realtors pictures before we moved in....

But back to what we're hear to talk about... the

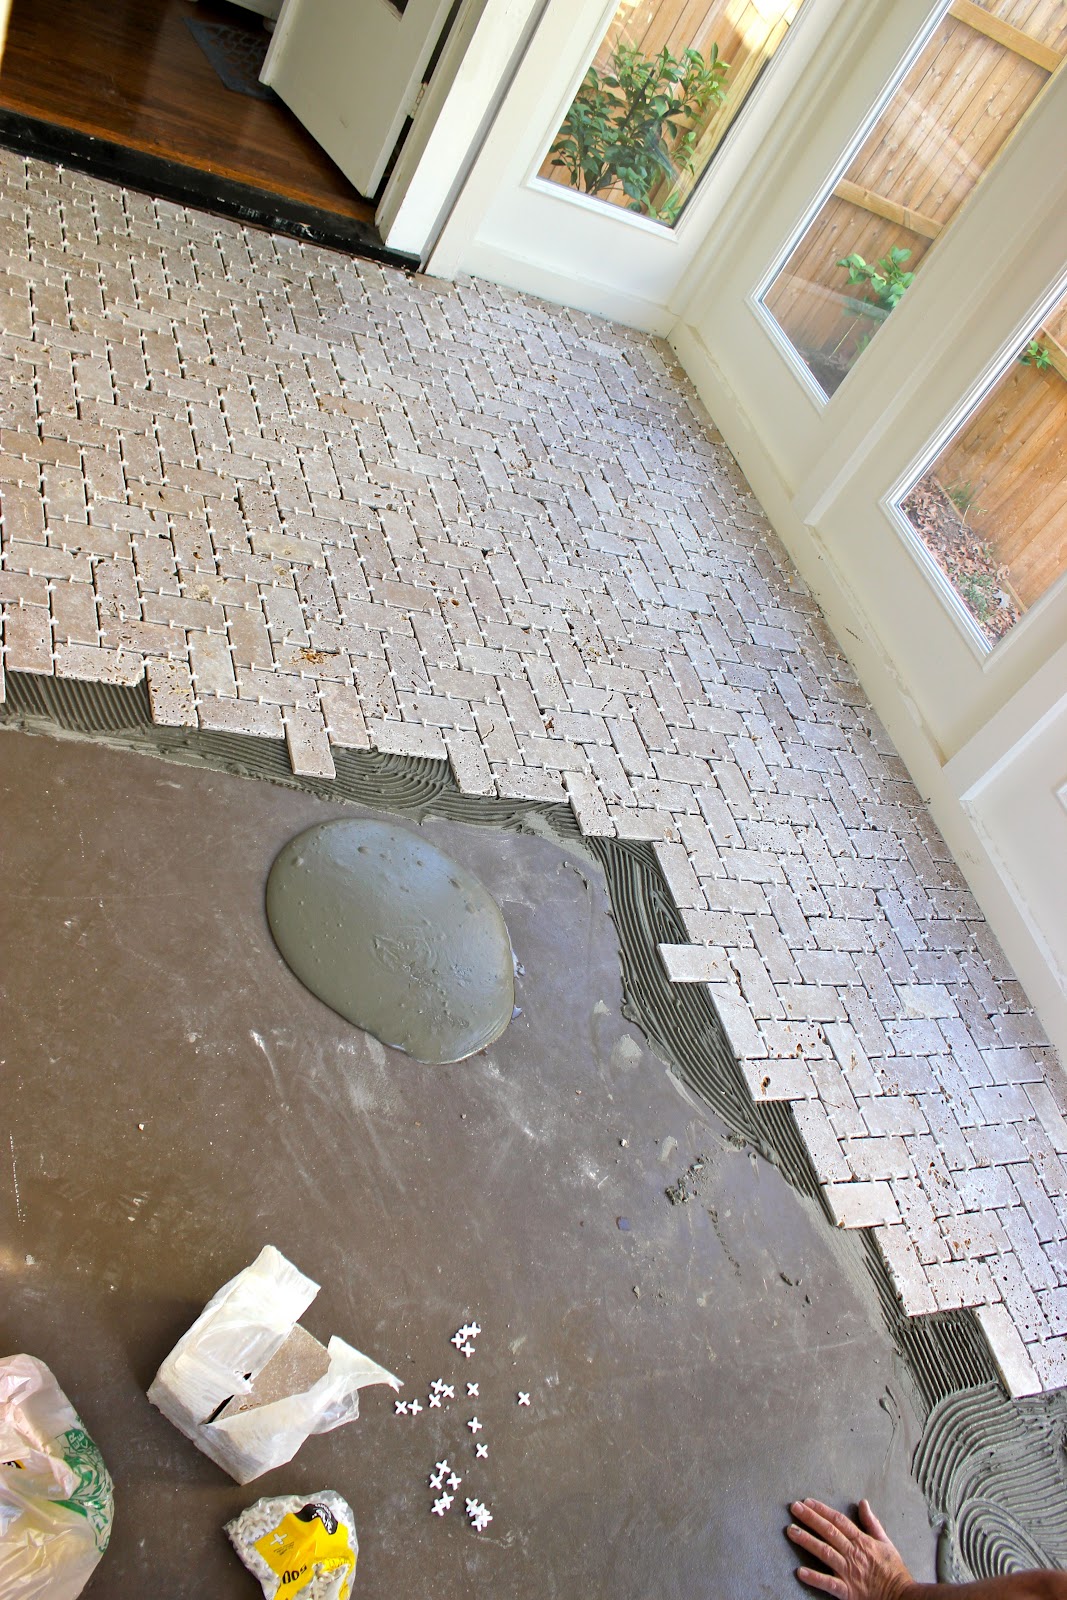
We knew we wanted to install our new travertine in my office first, especially since it would be the easiest to do (just lay it right on top of the concrete! No prep needed!) Luckily for both Chris and I, Chris's dad is kind awesome/amazing/crazy-talented when it comes to things like this.

Instead, here is a picture of Chris's dad doing his thing.


After a couple hours, here's where we stood..


They seriously were at this ALL day but tile by tile it came together...


Oh, and we used about 2,400 spacers... ... ... not that we were counting.

Chris had to break out the wet saw and used it a LOT on this project.


Update: Yes, Chris survived this project with all 10 fingers... (I knew you were worried)...
Thank goodness my man is handy!


Needless to say, he was pretty excited when he finished...

But here it is! All set and drying!


I decided to go with the "Alabaster" color, since that's what my parents used with almost the exact same tile and I knew it would look fan-freakin-tastic...

Chris, dressed in his Sunday's best, went to work grouting....


Chris applied it with a roller, making sure to cover the entire area and get in all the cracks...


I dont know if you guys have seen my page marked "House Tour" but its all the pictures the realtor took of the house when they were trying to sell it... the one common thread throughout the entire house? Blue/grey walls...

Side note: here's a fun picture from the painting party we had right before we moved in... we just did the dining room, living room, and hallway, but it really made a difference!

SO pretty in fact, its what I decided to paint my office... after I primed, of course...


That night, I started to move furniture back into my office.

But I finished up the next day and am SUPER proud to reveal how it looks NOW!


So for the MUCH anticipated before and after shots, here you go....

And one via the old realtor picture, just because...

So... what do you think?? Like the new tile? The herringbone pattern? or would you have gone with something else? Different pattern, different size/color tile, different color grout? I would LOVE to hear your feedback!!
P.S - We have already started putting this travertine in another space in our house, but I wont give it away just yet... its going to be a TOTAL transformation though!! So excited to show you guys soon!


23 comments
you guys are so so busy!!! the tiles look amazing. such a lovely change. great makeover.
ReplyDeletecheryl xox.
That looks great! Amazing how much brighter the whole room looks with the new wall color and lighter floors...beautful!
ReplyDeleteOh WOW! I think I would have stared at the floor all day! haha your floor turned out fabulous!! That room is so much brighter now.
ReplyDeleteYes, I do love the new tile. And the sealer totally made it pretty and shiny and glossy. Such a pretty room.
ReplyDeleteThe look and texture of your new tile is fantastic! I wish I had someone in my family who is crazy, awesome with installing tile.
ReplyDeleteWow. Love love love the herringbone! I've done a lot a of tile work so I can sympathize with all the work that went into that beautiful floor! If I may make one tiny suggestion regarding your sealer. Please try the 511 (aquamix) impregnator and sealer. All the big tile guys use it and I've used it myself. It's superb in wet areas. You need the impregnator which actually seeps into the stone, rather than just a sealer that sits on top. Just MHO.
ReplyDeleteThanks for the tip Beth!! We plan on putting this travertine in the bathrooms and kitchen too so we'll definitely make sure to use the 511... Thanks!
DeleteLove it! I need to get me a handy man. Although he is a handy man, I need to light a fire under him. What's your secret??
ReplyDelete...this is a family friendly blog, so I really can't say ;-)
DeleteBeautiful job!! I love the transformation and your Boxer :) We have a boxer and love him. Megan
ReplyDeleteHey Samm!!! The transformation looks awesome! Great job. You are way too good at taking before and afters. You know how to capture the whole process which is great! May need your Chris to teach my Chris a little something:)
ReplyDeleteIf I didn't work full time, I would spend my days marveling at all your AMAZING work! It's killing me not to check out whatever you have linked and live vicariously through you. I want to live life over and be you! :) Seriously, Samm - it is such fun seeing all your projects and I laugh out loud reading your blogs! xxoo, Sue
ReplyDeleteThe floor turned out AMAZING!!!!!!!!!!!!! What a difference. Great pics too of the floor. Oh, have u considered moving the desk out a bit so u can add the chair to the other size facing the windows instead of facing the wall ... maybe u can try it one day and see how it feels. seeing natural sunlight is very energizing!!! Again great job to u and ur fam! Did u pay ur hubby with beer? haha
ReplyDeleteLate to the party - but let me agree - that tile floor is freaking amazing! GREAT job! Thinking about tearing up some tile in my house just so I can have this instead!!!
ReplyDeleteThe tiling is incredible! Where did you get that desk/table from??
ReplyDeleteIt was a craigslist find! $30!!!
DeleteI enjoy to translate and revalue your transmute.
ReplyDeletepremium travertine tile
Thank you for sharing your beautiful room.
ReplyDeleteA question, where are the dog beds? and, not a criticism just my preference, the desk facing the wall not the garden?
I found your page through Pinterest you have some great ideas and the finished house, should you ever stop having projects (:=) will be wonderful.
Mali
Hi Mali,
DeleteThis is actually a very OLD lay out when I first started working from home. Since then, Ive actually moved into the front bedroom of the house for work and its 10x better! Here's the link if you want to check it out! Thank you!! http://www.littlehouseinthebigd.com/2012/09/office-update-frames-and-chevrons.html
http://www.littlehouseinthebigd.com/2012/09/new-rug-and-pinterest-fail.html
The tiles looks good! Thanks for sharing this post Samm! I think I am goona use this as a reference once we transfer to our new office at the Crown @ Robinson The tiles looks awesome! and I cant wait to install that kind in our new office.
ReplyDeleteWhat you'll do is that you just might place pink tiles in strategic places, type shapes and stuff to form it look attention-grabbing. That alone is enough to form an impression that pink is that the dominant alter the toilet, for more information visit here tile saw reviews.
ReplyDeleteA floor proved AWESOME!!!!!!!!!!!!! Such a difference. Wonderful pictures as well in the flooring. Wow, have ough regarded as moving this workspace away a lttle bit consequently ough can easily add this couch on the other sizing facing this glass windows rather then facing this wall... probably ough can easily try it out 1 day and discover the way that can feel. viewing normal sunshine is very energizing!!! Yet again great job to help ough and also 3rd there�s r fam! Does ough pay out 3rd there�s r spouse using alcohol?
ReplyDeleteLynnwood Granite Installation
I know this kind of tile. It brings the cool feeling when you walk on with bare feet, even in hottest days of summer. Glad to see another house with this tile installed!
ReplyDeleteComments make my heart happy... and I read every ONE of them... thank you so much for taking time to make my day!