Bathroom Remodel - it's happening

1:00 PM

Actually, it's happenED.  We are pretty much DONE with this bathroom remodel but I wanted to show off all the "during" pictures that it took to get to the final product.

FINAL pictures will be posted tomorrow!!!
(UPDATE: you can now see the "afters" by clicking HERE)

First, let me start off by apologizing for not keeping everyone up to date with pictures as this whole process went down.  Or even letting you know we were going to be starting this remodel. Full-time work + baby + little to no help = zero time in the day for anything minus a glass of water, handful of almonds, and a few hours of sleep (side note: best diet ever).

If you remember from our kitchen remodel, we had planned on remodeling our bathroom A YEAR AGO shortly after we finished our kitchen.  Hahaha, silly us. With being preggo and the happy arrival of Brooks Bailey, remodeling got pushed back a bit until we had the means, money, and time.  Insert March 17th (aka. bathroom D-day).

To refresh your memory, here is what our bathroom looked like before the remodel.

Actually this is a picture of how it looked when we were buying our house (read: clean).  You will notice the size (tiny), age (beyond dated), peptobismol pink flooring, and (my personal favorite) the seashell shaped sink (God-Almighty why did that ever become a "thing"?).  For a family of 3, this just wasnt going to cut it for us.  With the floor tile and backsplash we used in the kitchen, plus some other travertine tile we got at the auction (as remembered here), we decided to update, knock down some walls, and make something a bit more our style.

This is what we had in mind:
As Im sure you notice, its this is not a rectangle like our bathroom was originally laid out.  See that area to the left?  Yea, that actually the CLOSET from my office.  It was really just hoarding jackets and work samples and since our bathroom was SO SMALL, we decided to knock down the wall and make it part of the bathroom.

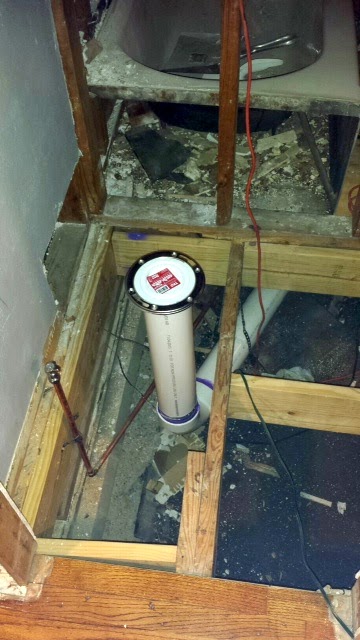
Cleaning it out was crazy but definitely made you feel how large that closet area was (or at least large for us).
we removed the closet bar to really get an idea of the full size
When it actually came down to it, Chris and I decided it would be best to get me and Brooks out of town since a 6 month baby isnt much help on a construction site (...lazy...).  So the majority of these pictures came from Chris's phone and what I was seeing 1,000 miles away in Arizona while visiting my parents.

First, that AWFUL vanity was taken away!
 Then the real demo began...
Goodbye forever pink tile!


taking down the wall to the closet!

 
After everything was striped away, we brought in our friend/plumber, Dan who helped us move the toilet to the closet, update our pipes, move up our shower head, and generally make sure everything looked ok.

 Regarding moving everything, we are INCREDIBLY lucky to have a house with a pier and beam foundation.  That means there is about a 24" crawl space underneath the house which makes moving drains and pipes SO much easier than a slab foundation which we would have had to break into.
 See that white pipe in the bottom left?
 Yep... our new poop-pipe out to the sewer.
 
 We also had to split the water and drainage for our vanity since we were changing from a single to a double.

 
 Here's a fun example of Chris in that crawl space I was talking about:
doesnt he look comfy!
 As usual, the dogs were a big help.
 Next step was reinforcing the floor with new joists and subfloor.
You can also see the whole in the wall that used to be the door to the closet!
 
 
 The next day was electrical... we moved the switch over to the other side of the door!! And Chris loved crawling around in the attic to get everything figured out... just ask him.
 Meanwhile, we FaceTimed often and I loved seeing all the progress.
Did I mention there was a lot of electrical?  Because for some reason this house had been wired 18 different times and about 20 different ways so it took a little longer than usual to get everything sorted out. 
 Happy to say everything is safe and to code!
 Chris's dad was also over everyday helping out.
 We couldnt have done this project without him!  Thanks Mike!


 In the shower, since we were tearing it all down anyway, we decided to include a shelving area for shampoos, soaps and what not.  Here's the initial outline.
 Up next was new dry wall and cement board to keep it mildew and mold free for years to come.
 
Meanwhile, while all that was going on, we got to take Brooks to a evening Spring Training game
My mom is a sucker for B, especially now that he's not so breaakable
 Back at the house, with the drywall in, tiling could finally commence.  We had 18" large travertine tiles, mixed with the hexagon tile backsplash from our kitchen, and the 3x6 travertine pavers from our kitchen floor.
 
 Notice anything missing in the above picture?  YEP! The 1980's glass block window is gone! We decided that since we were adding can lights and werent just relying on the vanity light and this little window anymore, that we could probably get rid of it.  Best. Decision. Ever.

Taking a cue from some other bathroom projects we've seen, we also decided to have different layers with different tiles in the shower.  This way, it draws your eyes up, up, up! (which is uber important in such a tiny space)
 When Chris originally sent me this picture, I was nervous.  The travertine pavers on the top looked more grey than the brownish tones we had going with the other travertine pieces.    However, Chris told me to remember once everything was grouted and sanded, it would look a lot more cohesive and a bit browner like our kitchen floors...seen here:
 Worry aside, Mike began tiling the floor.

No more doorway to my office either!
 The tub?  Looking awesome
 We also had the same guy who made our kitchen cabinets make our built ins for the bathroom.  He made them out of a paint-grade wood but Chris and I saved a couple hundred bucks by painting them ourselves.
 Here's our cabinet guy, Shannon, installing everything.
 Did I mention he also installs crown molding?  I think this just may have saved Chris's sanity.
 In addition to the can lighting we put in the bathroom (3 to be exact: one in the middle of the ceiling, one in the shower, and one above the toilet) we thought some cute hanging pendent lights would look cute above our future mirrors.

Behold, my favorite splurge of this remodel, Restoration Hardware pendant lights with an Edison Bulb.
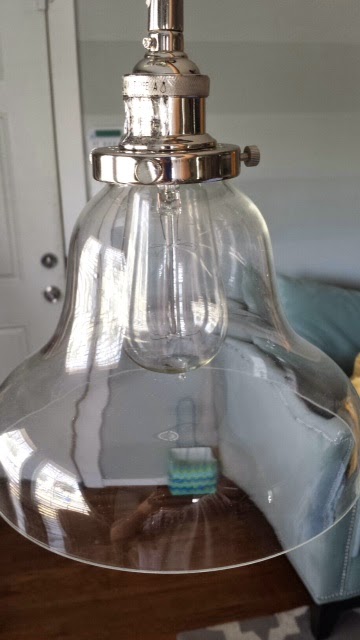
can be found online here
 They are their "Clear Glass Boulangerie Filament Pendants" and at $99, they were only a few dollars more than some other Home Depot ones we also liked, so it kinda seemed like a no-brainer for us.
With the floors all finished, we even enlisted the help of our friends to assist with some finishing touches.
Thanks Blake!
 After painting, (our color is Restoration Hardware's "Ash" which we had color matched at Home Depot) we put in some pretty base boards to make the whole thing fancy.
 Some last steps were adding our new shower head set and trying not too drool every time we took a step back to see our work.
 Last little touches were finding a shower curtain.  To keep things from getting too busy, we thought a plain colored one would be our best bet.
 And of course, I brought the world's cutest shopper.
If this picture doesnt make you go "awww", you have no soul.
 After putting up the shower curtain, Chris and I nearly shared a cry when we saw our finished product.  Its seriously beautiful.

I canNOT wait to show you the final pictures tomorrow. It will blow your mind.  All in all, from start to finish, it took us 13 days to complete.  Not too bad for doing everything ourselves!!

Have you guys done any spring project yet?  Have any questions about our process? (all of those will be directed to Chris since I have no clue).

See ya tomorrow!
-Samm


Like us on Facebook

Little House in the Big D

Flickr Images