Looking for quality/inexpensive baby stuff? Run, don't walk to Babies R Us NOW!

12:41 PM

Ok this is just a quick post to let all those other mamas out there that a HUGE closeout sale is going on right now at Babies R Us!

Their private high-end section, Isis, is closing down (maybe an in-store concept that didn't work?) but everything in that section is 50% off or more!!  Its full of high-end green/organic toys, clothes, baby care products, hands-free nursing bras, Aden and Anais blankets and swaddles, Baby K'tan wraps, cloth diapers, etc!!

Here's a quick run down of what I scored:

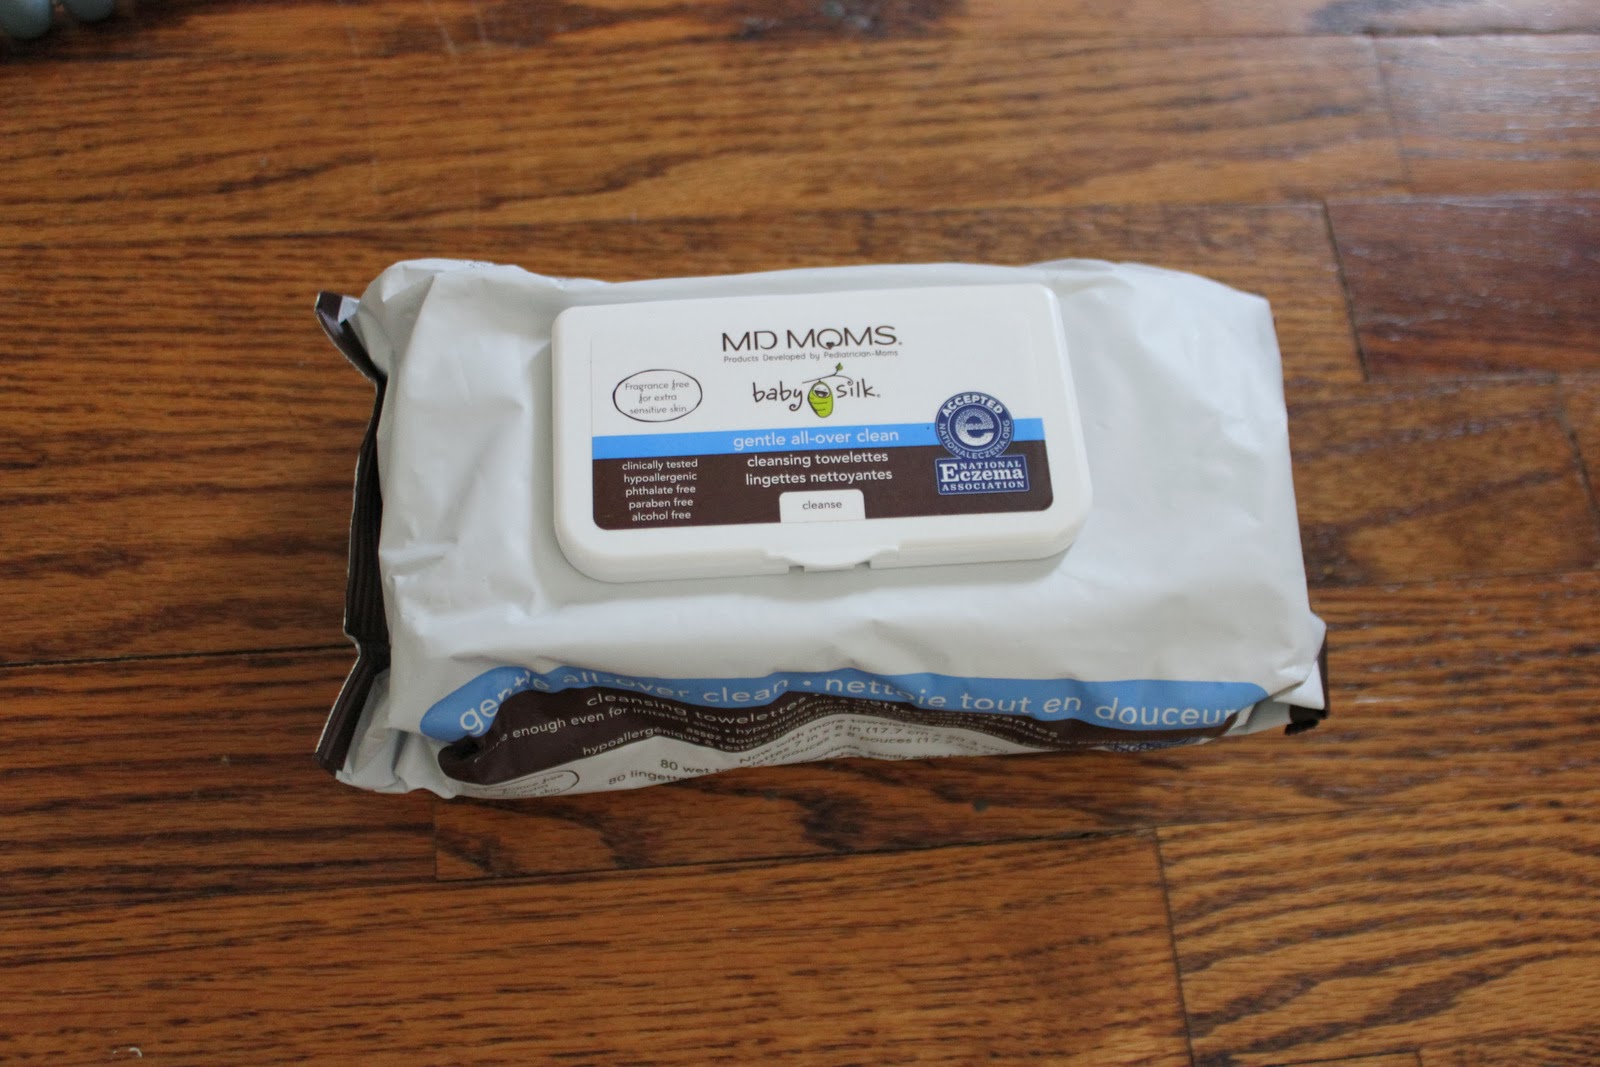
 2 GroVia cloth diaper shells, a 2-pack of GroVia inserts, MD Moms all over wipes, Chewbeads, and Isis private label organic cotton bib.  All for less than $50!

I'm really excited to try out these GroVia diapers.
 As you know, we are BIG into cloth diapering (I love Love LUV it!) but haven't tried these before since they are so expensive ($20 for just one shell and $25 for a two pack of inserts... that's almost $35 a diaper... for ONE!) but I've heard great things!

They are a snap-to-size diaper but with a velcro closure.  I also love how they have a snap insert, instead of pocket.  Pretty cool! No more stuffing diapers!
 These MD Mom's wipes are supposed to be fantastic.
 Great for babies with delicate skin (don't all babies have delicate skin?) and can be used on their hands and face for boggies as well as on their bum.

Also super stoked to score some ChewBeads.
Little Monkey Man has been teething like crazy and I have a couple of friends that swear by ChewBeads.  Not to mention they are adorable.  Here's the link to their website to see all their cute styles.

And last but not least, the bib.

Yes, we have about a thousand of the cheap little 10 for $1.00 bibs laying around the house (hello, Brooks is teething!) but this one was just too cute to pass up.
Plus, I'm kinda obsessed with the fact that it looks like a dickey.  Let's bring those suckers back! HA!

Anyway, great, awesome, super-adorable stuff for super cheap right now at Isis instead Babies R Us.  I dont know if all Babies R Us's have an Isis (again, Im thinking it was a failed concept?) but if you know of one around you, its worth hitting up! Great for stocking up on baby shower presents too!

Good luck!

-Samm

Easy DIY Wooden Name Blocks

3:09 PM

Honestly, I started this project when I was still pregnant with Brooks and didn't remember to finish until he was about 6 weeks old.  When I actually sat down to do it, the whole thing took about 2 hrs from start to finish including drying time, so I probably should have had this done a lot sooner.

Back before Brooks was born, we got this awesome vintage bar/dresser/changing table on craigslist, but no matter how much we tried to dress it up, it still needed a little something.
I toyed around with the idea of putting fun frames above it like this:
image from here
Or some shelves like this:
LOVE the manly feel of this one!
 or this:
But the more Chris and I fooled around with eclectic nick-nacks, the more the nursery started to look like a small time Bennigans.  Between our Texas military map, vintage art, and horse shoe, we had enough "stuff" going on.

So I decided to make something and put my own spin on it.

Chris and I were both smitten over the name "Brooks" from the moment it touched our ears.  I loved how the name was a little secret just between the two of us before our little man was announced to the world, so I thought having something with his name above his changing table would be perfect.  Personal, but not too "much".

I liked the idea of hanging something, like this below, but with a bit more of a manlier touch.
First, I nabbed these 5.5 x 7.5 wooden blocks from Hobby Lobby.

At only a $1.47 a pop and then 50% off, my total came to $4.41 for all 6 blocks.

My plan was to stain them, mark each one with a letter from B's name, and hang it (securely) on the wall. The idea of having these wooden blocks just  "on" the wall seemed a bit boring to me so I decided they should probably hang from something (twine?).

Keeping with something more masculine, I hit up our local Home Depot and browsed their coat/hat rack section.
Two of them caught my eye.  The first was a smaller hook which I thought might be nice and simple... nothing too crazy to take away from the wooden blocks.
The next was a bit showier: two layered with just the slightest bit of embellishment.
I'll let you guess which one I chose.  **cough**the last one**cough***

At 5.5x my total block budget, $25.62 was a bit on the higher end of what I wanted to spend but figured something uniquely DIY was worth it.

Once I got home, I gave my blocks a good stain.  I can't tell you what the exact color was, but it was a mix of all three of these:
Early America, Gunstock, and Ebony
While those dried, I found some extra twine I had laying around the house and cut foot long pieces for each block
Once the stain dried, I used super glue to adhere the heavy twine to the back of the blocks.
I actually did this step twice to ensure that there would be NO WAY the twine would be able to come off and let the blocks fall
I then flipped everything over and super glued my letters on.
 Sorry, I forgot to mention I also found these acrylic letters at Hobby Lobby for $2.00 a piece.  (Bad Samm for not taking a picture earlier)

I then cut my twine and made a knot for each block.
 The reason I did this instead of leaving it as a loop was because it would have nearly been impossible to have all the hat hooks the same height AND the twine the EXACT same length to have everything even.  This way, with a knot, I could tie and retie them to the appropriate length so everything would be perfectly even.

At first, I hung the letters from the lowest hook.
I know you can't really tell from this picture, but they looked a little weird hanging at an angle off the wall instead of flat up against it. 

So I put it behind the second hook.
Much better.

Low and behold, it turned out wonderfully.
I really like how it looks when you walk in and I love the fact that it stays in line with the whole wood/manly thing we got going on.  Plus, Brooks loves to stare up at them while he's getting changed.
All in all, the project cost about $30, not including the stain and twine (which I already had).  Not too shabby for some unique nursery name art.
What do you guys think?  I would love your feedback!

Thanks!
-Samm

Nursery Finale

12:08 PM

Well wow... I can't believe Brooks has been here for almost 5 months and I am JUST now getting around to posting about how his nursery turned out.... ... ...this would usually be the point where I would call myself a "slacker", but since I take pride in the fact that I have kept another human being alive for 20+ weeks, I'm going to give myself a break.

As you may remember from my post here about finding the dresser/bar/changing table, I decided that it was really missing something hanging above it on the wall.  I toyed with the idea of shelves, pictures, vintage art, but nothing really seemed to fit.  That's when I decided to make my own little something-something and am just THRILLED with how it looks.

 
Simple, but a definite statement.  I think every baby's room should have their initials or name somewhere in it and having Brooks' name up on stained blocks kept with the old-timey theme I was going for.
 I plan on writing a whole other post about how I made these beauties (SUPER easy and cheap cheap cheap!) which I should have up no later than next week.

To the left of the changing table, we have the reading nook.
 We are still loving my thrift store glider and use it every night to read night time stories.
 One of my favorite random accidents so far has been the wine crates that we use as book shelves.
When I found them at a flea market for $3, I had no clue what I was going to do with them but they have been a great space saver and really fit in well with the decor.  I also love how the books are easily accessible while sitting in the glider and will be great "Brooks height" to pick out his favorites once he starts walking and selecting his own pre-bedtime stories.

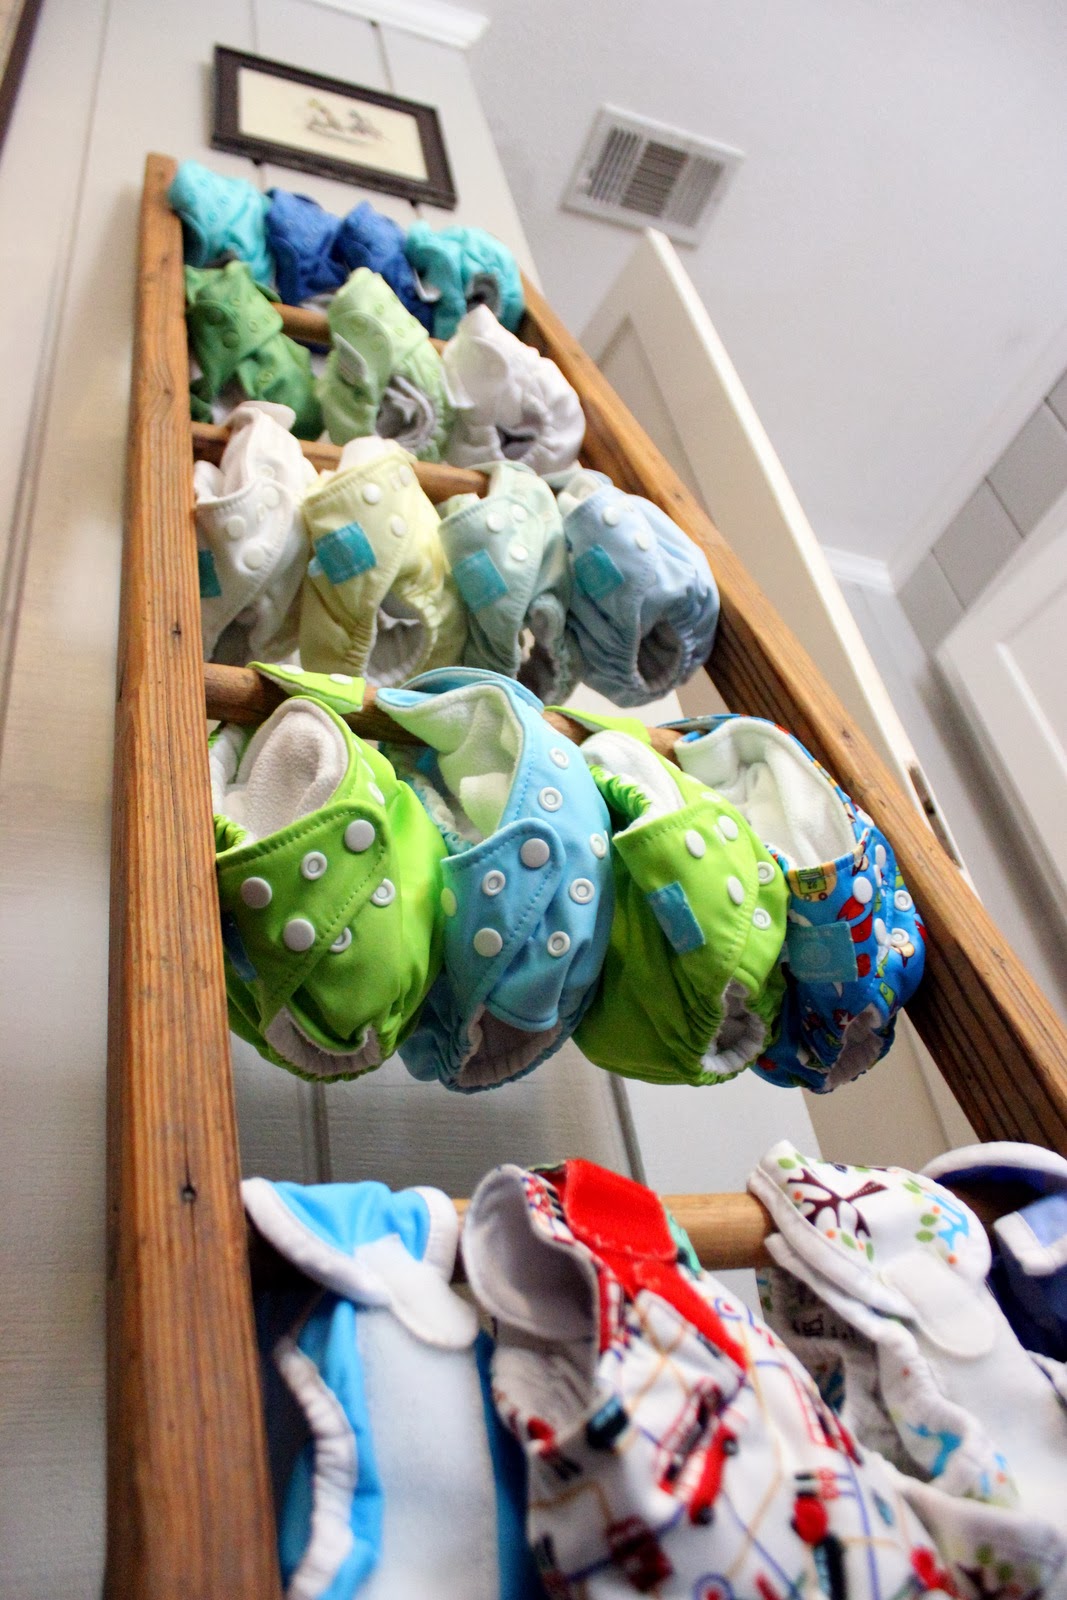
Back across the room to the right of the changing table is our flea market ladder which we use for cloth diaper storage.
Honestly, we LOVE this thing!!
The wood grain of the ladder totally goes with the rest of the room and I kinda think it's cute to have the diapers out on display.
We are loving cloth diapers so far and I plan to write another post about my likes, dislikes, ups, and downs for all those interested.

And on the opposite wall, we have the crib.
We scored this awesome sucka on craigslist in perfect condition for $300 (compared to the $1200 retail price tag!) and it fits the room just perfectly. I love how it'll be able to convert to a toddler bed and then a full bed with head/foot board when he's a "big boy".

Oh and that map above his bed was an $8 garage sale find as remembered here.  It's just a BIT too large (still doesn't fit even if we try to take it all the way to the ceiling), but I love it so much I really don't care. 
The mobile and sheets/bumper/quilt are all Pottery Barn Kids. My awesome co-workers all chipped in a got me a Pottery Barn gift card when I was pregnant so Chris and I went on a shopping spree for all of B's crib stuff.   Sadly, PB doesn't sell this exact madras print anymore (they replace it with this one which has more greens and oranges) but I'm loving how the reds, whites, and blues compliment the wood/vintagie vibe we got goin' on.
Well, that's about it for our little man's little room!  What do you think?  Not bad for a bunch of flea market, garage sale, craigslist scores!

-Samm
It's been too long...

6:22 PM

Dear GOD has it really been almost two months since I've posted?  Ugh, guys, I'm sorry... that's just unforgivable especially since I have so many fun projects, new ideas, and room updates to share!!

I hope everyone had an AMAZING holiday and Happy New Year!! One of my new year's resolutions was to make blogging more of a priority so look for more posts more often coming soon!

I am editing some pictures now of how Brooks' room finally turned out (how did I never post those?!! It seriously looks amazing and we LOVE IT!) Plus, the last project I did for his room!

Ugh! So much to do!! Can't wait to share!!

Thanks for sticking with me!

- Samm

Oops, I almost forgot! Here's our Christmas card this year... better late than never I guess!! 


Like us on Facebook

Little House in the Big D

Flickr Images