Hearth and Hand piggy bank hack!

2:23 PM


Let's just start by saying Joanna Gaines can do no wrong. The woman has style, class, manners, and design oozing from every strand of her beautiful, Disney-Princess-like head of hair.
I think nearly every woman over the age of 27 squealed like an excited pig when we heard she would be working on a home decor line with Target, Hearth and Hand, and money has been flying from our wallets ever since.
It was actually a recent flier that Target mailed out that peaked my interest in one of Magnolia's new items; their set of mini piggy banks.Give, Save, Spend Piggy Bank Sour Cream - Hearth & Hand™ with Magnolia


Give, Save, Spend Piggy Bank Sour Cream - Hearth & Hand™ with Magnolia


With my oldest not even being 6, but OBSESSED with making a buck, having the division of "Give","Save","Spend" I thought was near genius and much needed for my boy.
I know the $25 price tag doesn't SEEM like a lot, but its a piggy bank, a glorified jar. I knew I could do the same thing but for MUCH cheaper... so off to the Dollar Tree I went.
They didn't have any "banks" per se, but they did have two types of glass jars that caught my eye... this one...
..and this one...
I figured I could make 2 sets, especially since I have two boys and God knows the "he got one and I didn't" complaints are REAL. Plus, each jar only being $1, I figured I could spare it.
I also found these sticker letters and figured since my handwriting is rubbish, these would probably work out best.

With everything being a dollar, I threw in these brushes too.
So here are my supplies.
The enamel paint and spray paint are a fairly significant part of this project, but lucky for me, I already had them on hand. If you were to go out and buy them at Joann's or Michaels, the spray paint is probably $3.50 and the enamel paint (for painting on glass) $2.00.
First, I went ahead and painted the area where I wanted my black letters with my black paint and dollar brushes.
These $1 brushes are trash... this kids painting sponge I had on hand from my kids' projects worked MUCH better and gave a smoother result.

After that dried, I stuffed it with some paper towels, taped off the top (so I wouldn't get any spray paint on the inside, and applied the stickers letters. Honestly just tried my darnest to get it all straight.
Took the sucker outside to spray paint.
And after two thin, even coats, and letting it dry, I brought it back inside to take the letters off.
I found it was a little easier to use tweezers and save the paint job.


I found it was a little easier to use tweezers and save the paint job.


Seriously, its that simple. And here's the results.
I also did the other jars and think they turned out adorable too.
I'm no Joanna, but not a bad little hack for $4.
Have you guys ever seen something in Target and though, "Eh, I could do that?" Anything you want to see me try and tackle? I always welcome the ideas! Follow me @MomTimeonaDime for more ideas, easy projects, and great finds! Thanks!

Plan of attack

1:50 PM

"ummm hello??"


Yea sorry I didn't mean to drop the bomb of "Hey we're knocking down our house and building new. Don't worry, I'll document everything" and then just disappear for a couple weeks.  

I had honestly planned on posting our architect's design and floor lay out so everyone could get a better idea of what we having planned for going where. But, true to form, everything is taking JUST a bit longer than planned and we're waiting on the final FINAL lay out of the house from the architect so I won't have to keep changing what I'm showing you.  We've gone through SEVERAL revisions that I have on my phone and when I bust it out to show people, I end up explaining half the time that "none of this is going to look like this anymore". ... 

To which people respond "Ok, then why are you showing me?"...
Exactly.

So, I should have that soon.

For right now though, I can kinda give you a rundown of everything I will be discussing in the coming months.

- how we plan to find a place to live while our new place is being built.
- our thoughts on packing and moving
- how we're going to juggle all this with three kids 4 and under.
- Hard choices and comprises
- Where we plan on spending the big bucks
- Design choices for each room (I can't wait to talk about the kids' rooms)... (and the laundry room... hold on to your hats)
- sacrifices for building vs moving
- inspiration
- greatest fears/looking forward to the best
- staying alive and living to 2019

That last one is really our main goal.

So, please bare with me as I try to get everything sorted out and hopefully don't change things a million more times to confuse y'all.
Anything you guys specifically want to hear about? Honestly, Im an open book so ask away!!

Big Announcement

10:01 AM

Hey all,

Long time no talk!  Yea, in case you've haven't been following me on Instagram (which I recommend you do @LittleHouseintheBigD) but in the nearly YEAR AND A HALF since Ive posted, I actually popped out another kid (Davis Dae, born 7/1/17 and she's amazing) and she's actually the reason I stopped posting long ago because I had such awful morning sickness I could barely function.  But with all that aside, we actually have some BIG news (not baby related) which is why I've begun blogging again...

TA-DA!

We are officially redoing the house!

And you maybe thinking, "Hey, that doesn't look like your house? That must be one hell of a remodel." Well, thats because we are tearing down our house and building a new one on the lot.

Let that sink in.

We are TEARING DOWN my little awesome amazing perfect tiny house.

It's so sad especially after all the remodels and updates we've done, but 1,450 sq ft for 5 people and 2 dogs just isn't cutting it.

And we've actually been contemplating this for a long time, and even looked into moving; same neighborhood, different neighborhood, fixer uppers, already reno-ed. And with the explosive Dallas market, nothing caught our eye or budget.

Then after meeting with different architects about just adding on to our little house, we kept getting the same answer "Honestly, to add a second story on a pier and beam foundation will cost just as much to build a new house."... AND, that way, we could get the EXACT layout we wanted.

So, October of last year (read: 2016, not 2017), we met with Eddie Maestri of Maestri Studio.  We met and discussed what we wanted, design ideas, and budget.  Our ideas seemed to mesh so we signed a contract and he went to town.

I'll have another blog post detailing what we want in a house, what I demanded we have (that didn't make it into the final layout (sad face)), and what my favorite feature of the new house is (spoiler alert, it isn't even INSIDE the house).

So stuff there is a TON of stuff coming up... and a TON of stuff I'll need help with (that I will pawn off as my own ideas and tell Chris).  Get excited guys... 2018 is going to be CRAZY.

P.S- Yes, we're still flipping condos and just sold #10. We really gotta catch up y'all...

the "Befores" of #4

2:34 PM

So yes, we went ahead and bough numero 4.

The condo Gods must have been smiling down on us since this one really fell in our lap.

Upon closing on #3, Chris and my brother in law David met with the manager of the complex to do a quick walk thru (ie. find out where the dumpster was, know which parking spots were for our unit, etc) and they started talking about WHY we had bought the place and were planning on flipping it.   The guy mentioned how he might know of another good unit if we were interested and called up the owner of a unit directly across the breeze way from us!  The owner said he was actually planning on meeting with a realtor the next day, but after seeing the unit, we decided to put in an offer and save him the money on a realtor.  Done!  And with a super quick close might I add!!

We are only a couple weeks behind #3 on this one but to keep everything from getting a bit too confusing, I think Im going to finish out #3 with you guys before I start showing you progress shots of #4.  Don't worry though, you'll still see it all!

And now on with the walk through!  If you have time and aren't at work so you can hear it, here's the video walk though to give you the best idea of the space.  It's a one bedroom, one bathroom, about 750sq ft.

So if you couldn't see that, or just want a better explanation rather than my muttered ramblings, here are photos!

The view right when you walk in...
Now I know you're thinking, "Wow, not too bad", but yes, bad.  The floors are that $0.39 laminate and are cheap beyond cheap.  And that bookcase?  Much like #3, we are going to take this one down too to create a pass through.

Here's the view of the kitchen from the dining.
The kitchen is pretty darn small...
And we are going to lose even more storage when we take out these three top cabinets on the right...
Heading back out the kitchen and toward the master is a tiny little hallway with the bathroom on the right.
Again, small, but I have big plans for this one...
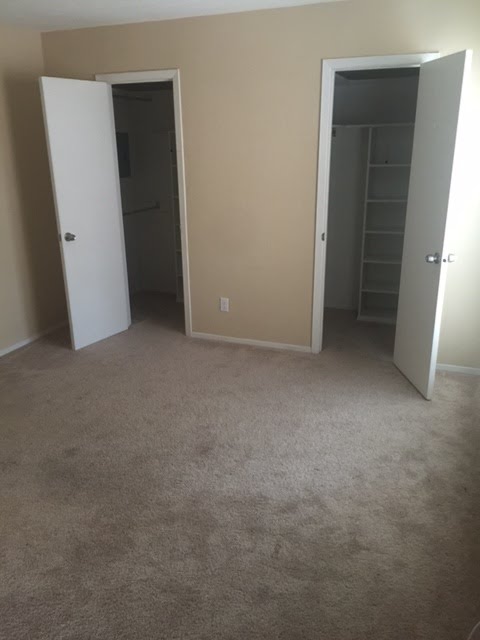
The master is a good size with two entry points for the large closet.
From the other side...
And yes, the carpet has to go...

Back out the master towards the mini hallway, there is storage directly across from the bathroom.
And back out to the living/dining...
Ugh I can't wait to open up that bookcase and brighten this whole thing up!

Speaking of brightening, did you notice anything missing?? Yea, lights... other than that GORGEOUS chandelier in the dining, the place has no lights... not in the living room or master... really people? Just gunna live off floor laps?  Thats not the way we roll in 2016.   Its going to be a pricey addition to removal all the ceiling drywall and install everything, but its a must.

Anyway, there you have it!  What do you think? I know the befores are always kind of boring but I think this one is going to be cool!

Enjoy!
Samm


Ugh... so far behind!

3:17 PM

Guys, ugh Im the worst!  I was doing so good keeping y'all updated and then life got crazy for a couple weeks and you fell to the wayside.  Sorry about that!

My oldest little dude turned three and with my parents in town, little everyday details on the condos became lost... here's a picture of Brooks with his gigantic, over-the-top-because-we're-like-that yard balloon.

After that, we shared the little secret on my Instagram account (LittleHouseintheBigD) that we have in fact bought condo flip #4!
I plan on posting more about #4 tomorrow with a complete "before" walk through video and pictures.  Get excited.

After that, Chris surprised me for an early anniversary trip up to Seattle to enjoy the cooler weather and watch our Texas Rangers play.
A buddy of mine that I used to work with at EPSN now works for the Mariners and got us on the field for Rangers batting practice.  In this picture, you can see me holding Chris up since he near fainting the entire time out of sheer excitement.
Happy fan with a ball from the bullpen!
We JUST got back a few days ago and really had to hit the ground running.  There is a LOT going on with #3 and I can't wait to fill you in... including new (dirty) floor and dry wall that's up!
More to come tomorrow!  See ya then!

SaveSave

Demo of #3

2:01 PM

Hey all... well now that #2 has wrapped and #3 is well underway, I thought I would give you an update of how its going...

To sum it up in a word: Demolition.

To rewind and reaccustom yourself, you might want to go back and read THIS POST when we did the walk through of #3... go ahead, it will open another window... I'll wait.

See... ok to continue here's the kitchen as seen before:
Yea, remember how we were going to take down those uppers and open this thing up, getting ride of the bookcase on the other side... well, we took down the wall and found these suckers.
UGH!!! OMG! Pipes, from the unit above us?!  First strike against flipping condos... you have to worry about the other units in your complex.

Such a major bummer...can't do a countertop island with pipes in the middle...

So here's a view of the old bookcase:
and here's where we are now...
Going back around the place, here's the front door and the closet that used to be there.
And a VERY scary picture of the guest room(as remembered before here):
And in the master... a before of the en suite.
and the now...
Back to the kitchen... demoed the far wall and now looks 1,000x better like this:

and, yet another sad view of the pipes on the opposite wall, because, ugh... le sigh...
Sooooo yea... we're detailing with that... options? Hopefully our plumber can work something out.

Fingers crossed.

Like us on Facebook

Little House in the Big D

Flickr Images