
DIY Nate Berkus vase
5:27 PMYep... I did it... For $6, I copied Nate Berkus...
 |
 |
So it should come to no surprise that when Nate (we are on a first name basis) came out with his collection for Target, many of us (aka. Young House Love, Bower Power, and about a million/billion other Americans) flocked to our local red and white store to score some of the action.
They only sad part about said "action", is that "pieces of Nate" can be somewhat expensive some times. Enter this vase/hurricane I found as part of his collection that I just fell in love with...

 |
| Also found HERE on Target.com |
All the components seemed pretty simple, so I swung by Lowe's to see what I could find.
Enter this rope I scored this rope for only $0.48 a foot.

By the time I got home to start my project, I wanted to make sure the ends wouldnt start fraying (it IS twine rope afterall) and decided the best, most invisible sealer would be a polyurethane (which is normally used to seal stained wood pieces)

 |
| I made two vases which is why there are 4 rope ends |
 |
| I used an unopened ikea frame since I knew I would be throwing the plastic packaging away anyway. |


I thought these would be great and easy to just push through my leather strap, but I guess the leather I used was just too thick because they would NOT go through... Plan B? Go back to the glue gun (ALWAYS go back to the glue gun).
So I used some pliers to cut off the ends...


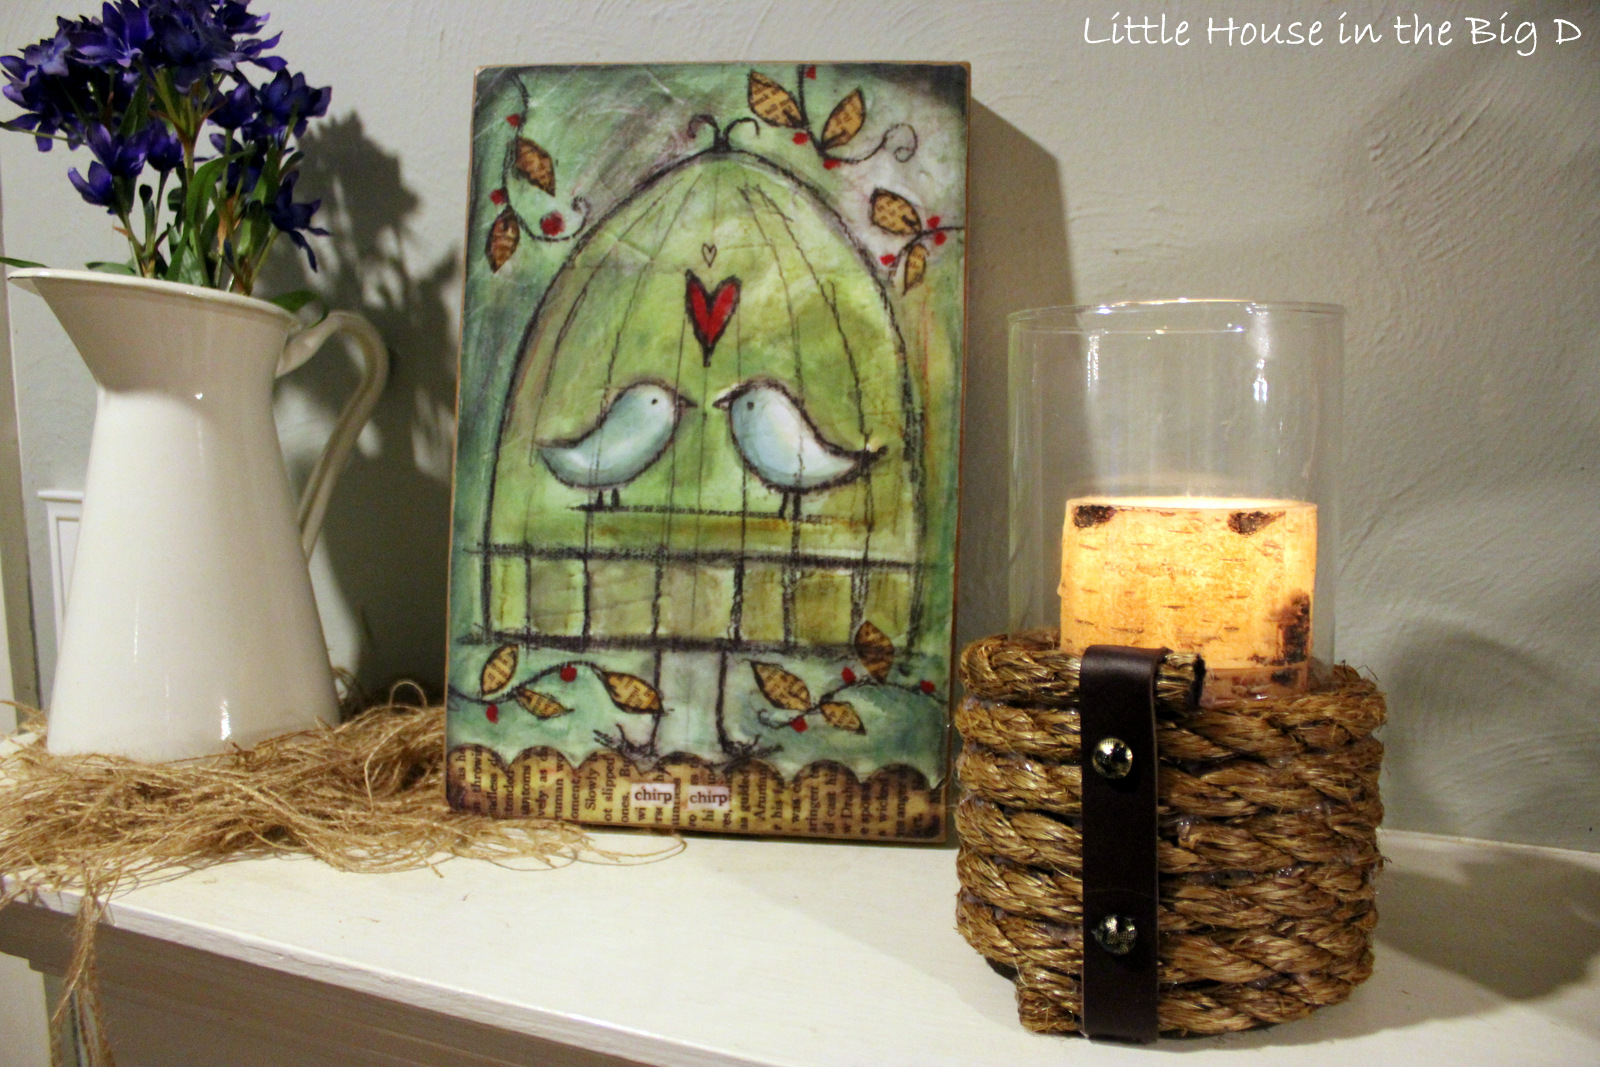
After everything set, I popped in a last-year's-clearance Pottery Barn candle, lit her up, and stood back...

Originally, I put it up on the mantle for all to see (ie. "Hi, did you guys see what I made? I made this. Isnt this cute? Oh, I should take a picture of it and send it to everyone in my phone? ok, great, awesome idea..."
 |
| Project photos of this to come soon. GREAT garage sale find turned Pottery Barn chic... |

-6ft section of rope from Lowes - $2.88
- Clear vase/hurricane from Michaels - $2.00 (after 50% off coupon)
- leather bracelet strap from Michaels - $1.00 (after 50% off coupon)
- decorative tac - already owned ($1.29 for 20 if you need to buy them)
- Hot glue gun and glue - already owned ($5.00 if you need to buy one)
TOTAL: $5.88 per vase
So for less than $12.00 I saved $38.00 for making my own Nate Berkus vase/hurricane... and I love them.
Have you guys ever tried to copy something that you have seen in a store or thought to yourself "I could make that?".... Cause now everything I see, Im pretty sure I can make "$199.99 for a pair of boots? I should just take a shoe making class..."..... ... ... ... this could be the start of something terrible.
-Samm


16 comments
I like your version better- great job.
ReplyDeleteWhat a pretty set up you have! I saw these vases, too, but wasn't about to spend that money =) I'd love it if you'd share this at my linky party http://accidentallywonderful.blogspot.com/
ReplyDeleteps- Our blogs have the same template lol Can't go wrong with gray and yellow!
These are so friggin' cute! Nate would be so proud of you! I love it - $5.88 per vase - genius!
ReplyDeleteToodie said right. I love it, your a genius! I saw that vase but had no idea where to find the watch band thingy. Thank you sooooooo much for sharing!
ReplyDeleteGreat work on your vases Samm! They look super cool - and great price too!
ReplyDeleteThanks for linking to a Round Tuit!
Hope you have a fabulous week!
Jill @ Creating my way to Success
http://www.jembellish.blogspot.com/
I have to agree I like your version better! Thanks for sharing!!
ReplyDeleteAdorable and very doable! I too suffer from the illusion that I can make ANYTHING. It's a problem.... TY for sharing your project, I'm going to try it!
ReplyDeleteThanks for linking up! I pinned this to my Spotlight Favorites board =) http://pinterest.com/bekapoe/inspiration-spotlight-favorites/
ReplyDeleteWe're featuring this awesome tutorial on Inspiration Spotlight tomorrow! Be sure to link up at the next party! http://accidentallywonderful.blogspot.com/
DeleteYes, I love that & of course the price! Also good to know as my kitty thinks my kitchen table is a scratching post & I need to recover the damaged rope at some point vs. getting a new table base. Visiting from DearCreatives.com
ReplyDeleteSending you an email with your featured button! Visiting from DearCreative.com & Inspiration Spotlight.
ReplyDeleteYours are the ones, I'd want to buy! Love these!
ReplyDeletei am lovin the vase even without the leather strap!
ReplyDeletehope you'll find a moment to stop by (if you haven't already!) and enter a giveaway i am hosting: http://www.hellolovelyinc.blogspot.com/2012/12/personalized-lovely-giveaway.html
smiles and happy weekend to you.
michele
You did a great job. I will be featuring this tonight at my Fall into Fall party that opens at 8pm EST. Please stop by and pick up an I've Been Featured button. Thanks.
ReplyDeleteCongratulations! You've been featured on Handy Man, Crafty Woman's Wicked Awesome Wednesday. Please feel free to stop by the site to pick up your "I've been featured!" button. I like yours better than the original!
ReplyDeleteChristian Louboutin Bois Dore, christian louboutin remise 50%, Discount Louis Vuitton, christian louboutin shoes, wholesale jordan shoes, ugg boots, ugg soldes, discount nike jordans, cheap christian louboutin, uggs on sale, Cheap Louis Vuitton Handbags, ugg australia, uggs outlet, Air Jordan 11 Gamma Blue, discount christian louboutin, Discount LV Handbags, christian louboutin, Cheap LV Handbags, ugg pas cher, Bags Louis Vuitton, Christian Louboutin Daffodile, ugg, cheap jordans , cheap nike jordan shoes
ReplyDeleteComments make my heart happy... and I read every ONE of them... thank you so much for taking time to make my day!