Porcelain Address Sign Giveaway from Ramsign!!!!

9:01 AM

(this giveaway is now closed... from random.org, the lucky winner is...

 #46!... Thank you Miss Christina Duggan for "liking" the Ramsign facebook page!
 I will contact you directly to get your Ramsign out to you ASAP! Enjoy! And thanks again to everyone who entered!)

Ok, show of hands.... who likes free stuff?
...Who likes pretty stuff?
...Who likes practical stuff?
...Who likes practical, pretty, FREE stuff?
...Who wants me to get to the point? (...this is where my husband usually raises his hand...)

Well, today you are in luck because I am hosting my first-ever FREE giveaway sponsored by Ramsign - Classic Enamel Design!
(pauses for shock and aww)
 Yea, they are an AWESOME company that makes hand crafted porcelain address signs that I think are just gorgeous!

I highly recommend that you check out their website: Ramsign.com and their facebook page to check out all their colors and designs!

Personally, Im kinda obsessed with their hunter green/white "Arrowhead" style...
My favorite thing about their signs is that they can be used for more than just house addresses!... Important date... favorite jersey number...number of loved ones in your family... they are practically ART!

And now you can have one for your home for FREE!!!  This would also make an AWESOME Mother's Day gift (the giveaway runs through Sunday **hint**hint**)


Good luck everyone! I will contact the winner Monday!

P.S- Sorry I've been a little M.I.A... Chris and I took a little break after all the work we've been doing on the deck and my job has really been cranking... but dont worry, we have some AWESOME new changes coming up!... Including a story about how I scored two of these breathtaking wingbacks for 85% off!!
I'm still giddy about this find... More coming soon!!
(pssss... I just posted about my awesome score HERE!)

Disclaimer:
This blog is a personal blog written and edited by me. This blog accepts forms of cash advertising, sponsorship, paid insertions or other forms of compensation.

 This blog abides by word of mouth marketing standards. We believe in honesty of relationship, opinion and identity. The compensation received may influence the advertising content, topics or posts made in this blog. That content, advertising space or post will be clearly identified as paid or sponsored content.

 The owner(s) of this blog is compensated to provide opinion on products, services, websites and various other topics. Even though the owner(s) of this blog receives compensation for our posts or advertisements, we always give our honest opinions, findings, beliefs, or experiences on those topics or products. The views and opinions expressed on this blog are purely the bloggers' own. Any product claim, statistic, quote or other representation about a product or service should be verified with the manufacturer, provider or party in question.

 This blog does not contain any content which might present a conflict of interest.

To get your own policy, go to http://www.disclosurepolicy.org

Adding Creeping flowers... the pretty kind

10:00 AM

So the deck is up and running... except for the fact that I really dont enjoy that the lattice on the west part of our deck...
Dont get me wrong, I LOVE the shade and the fact that it SAVES us from the soon-to-be 100-degree days but it just does NOT look that hot (temperature pun intended)
Yea, eww... with a pretty deck, why oh WHY am I letting this side suffer?
I love our little Pottery Barn set that we got for our wedding shower, but the lattice behind it just isnt cutting it.

Enter Home Depot (and advise from my favorite gardening guy: shout out JB!)... Chris and I came home with these pretty little guys...
Westeria, Jasmine Star, and Mandevilla... arent they pretty?... they are all fast-growing, vining flowering plants that bloom at different times of the year... I figure that way, the lattice will stay colorful throughout (most) of the year!

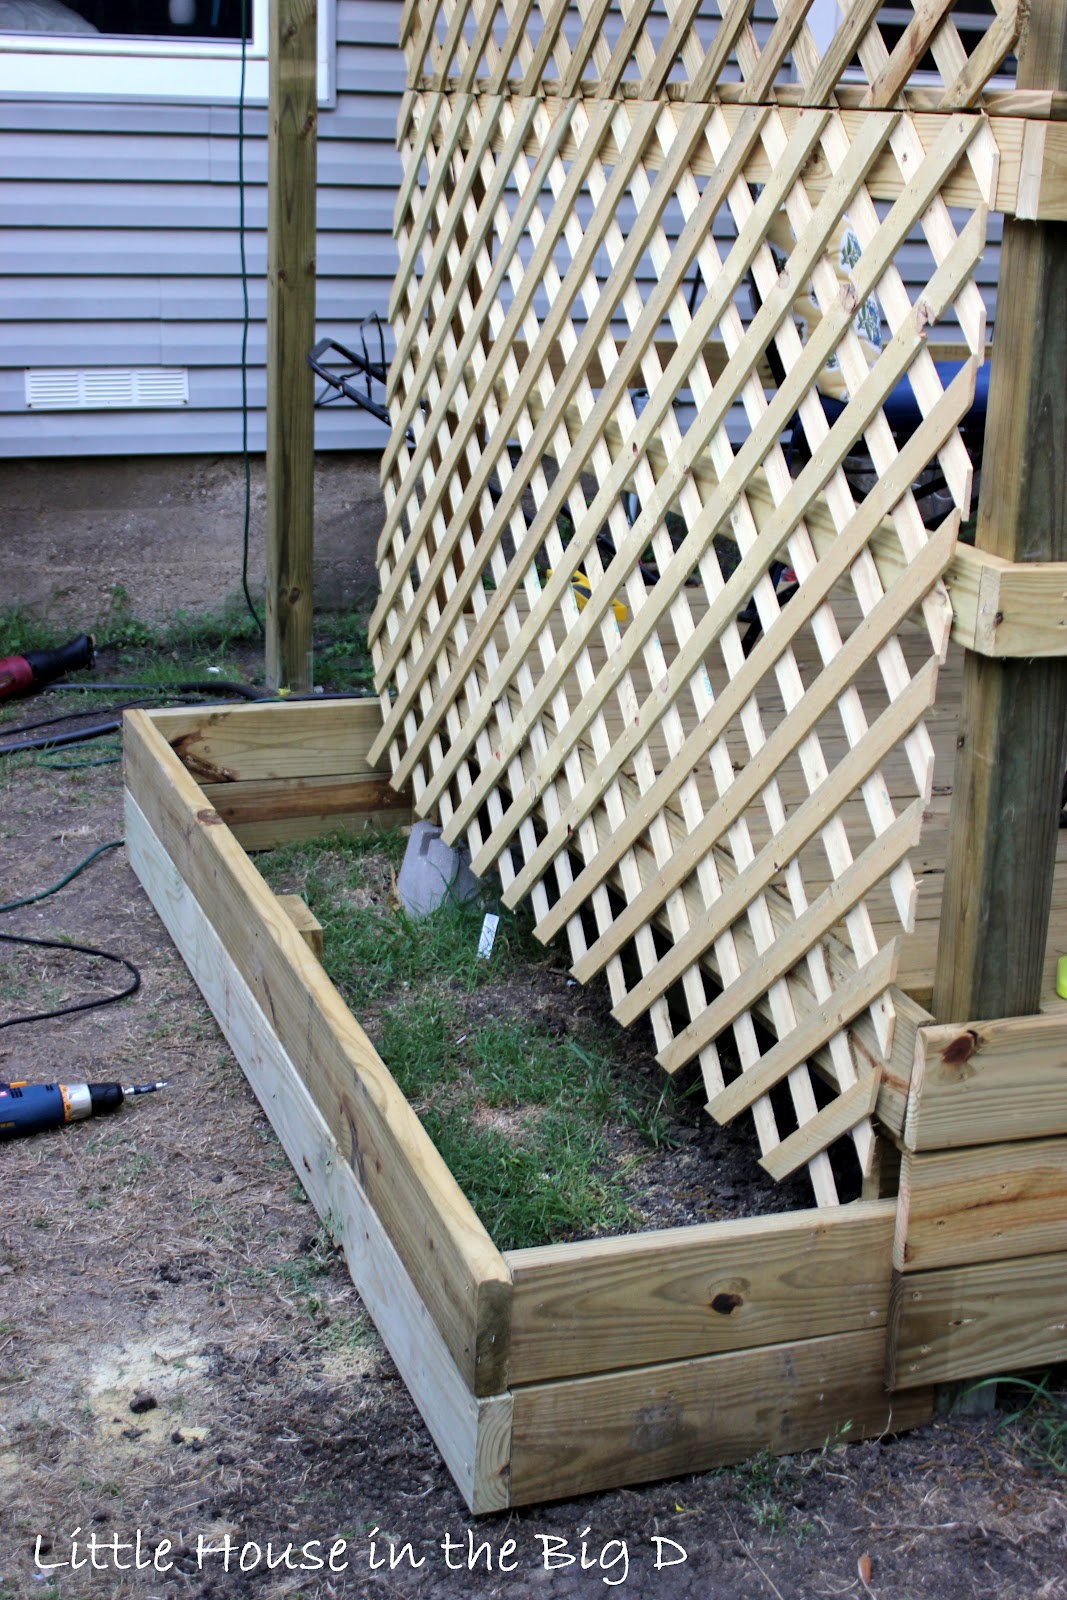
Chris took care of the building the planter box...
Seriously, I dont know where this man would be without his hand saw...

We decided to make it a bit taller than our other planter boxes, especially since we had to balance out the height of the deck.

As always, Rocky was paying close attention so he can someday take over and make his own dog house...
He's so cute when he breaks out his pencil and notepad... adorable

I even got to help!
(side note: I had to really press the back of the drill to get it in their nice and secure... this picture just looks weird...at least my guns are showing)

Planter built!!

...and Rocky approved..
Seriously, this dog is OBSESSED with having his photo taken... SOOO full of himself.
Next step was soil!
We also placed a 10" board at the bottom of the lattice so all the soil didnt slip back under the deck.
...and then installed the flowers!!
We plan on growing the outside ones toward the middle and the middle one growing out... that way, when they are all interlacing, one of them will always be in bloom.
I know its just a start, but here's how it looks behind our little table set...
Our Jasmine Star...
Mandevilla....
And wisteria...
Heres a better picture to get the full scope of the little addition...
So there you have it! They've only been in about a week and between the Miracle Grow and my positive words of encouragement (duh, I talk to them) they seem to be moving slowly but steady.
Has anyone else planted Westeria, Jasmine Star, or Mandevilla? The Jasmine star smells AMAZING!!!

Wine Bottle Torches

12:51 PM

Well now that we have a deck, pergola, and lighting, the only thing that we really NEEDED to enjoy our wine beer mixed drinks dinner good-times out on the deck, was a way to get rid of all the pesky little night-time critters... and by critters, I mean mosquitoes...

Little known fact between me and these winged creatures of the night, we have had an on going battle for the past 26 years... Its a love/hate relationship. And by that I mean they LOVE me and I HATE them.  Seriously, Im outside for 5 minutes and I come back in looking like I have the chicken pox... I LOATHE mosquitoes... yes, LOATHE.
So when thinking of solutions to this problem, Chris kindly suggested tiki torches... and I kindly replied "over my dead body".

This beautiful deck/outdoor area will NOT be cheapened by tiki torches... no, just no.

Enter the Google, where I stumbled upon THIS website explaining how to make "Wine Bottle Tiki Torches".... GENIUS!!!
Full details of how to make these can be found on there website: HERE
Since this is their idea, and not mine, this post isnt going to be a "how to" but rather a "we'll try it and let you know how it goes"

First step first, we needed wine bottles, at least 6 of them.... (our friends our always willing to contribute to a good cause so each graciously helped provide at least one drank empty bottle)
 I let them soak in some hot water and soap to get the labels off (tip: scrubbing them with steel wool after helped get off all the little bits of glue)
 We then pre-ordered all our needed tools per the "how to" website via Lowe's and picked them up a few hours later (P.S- if you shop at Lowe's, you NEED to be using this service... it saved us TONS of time and we didnt have to scour the store asking "What isle can XX be found?" or "I'm probably starring right at it, but can you help me find XX?" We love it!)
 All in all total was a little over $3.75 for all the supplies per bottle... not too shabby! **side note: the only thing I would recommend is buying a 3/4" spliter instead of a 1" (it was too big)**

I was a little worried about the wicks and would DEFINITELY recommend getting the wick/bottle seal as tight as possible.


First time we tried this, ours was a little loose and they would only stay lit for about 3-5 minutes before going out... lesson learned: make the seal SUPER tight to suck up all the oil!
 We didnt flood the bottle with a ton of Tiki: BiteFighter (its the super-duper anti-mosquito oil because I am NOT taking any chances) but just left the tip about 1-2inches deep.
 Once everything was happy and built, we had to determine where we wanted them on our deck...
 We decided a little above eye level so 1. People could see them and 2. It was the height we determined was least likely to catch anyone on fire.... which is a bonus.
 
 Last drill just to make sure it was secure.
 Ok, so super pretty!!


I seriously couldnt wait until it was dark to light them! (P.S- they stuck out about 5 inches from the beam.  We were worried at first that this would look kind goofy, but they ended up being perfect and we didnt have to worry about them accidentally catching the wood on fire or leaving any scorch marks)
 Here's a pretty blue one...
 We decided that 5 bottles was the magic number and tried to put everyone parallel to the railing (except one beam that didnt have railing) to make sure they would stay (for the most part) out of everyone's way...
 A full deck view:
 And at night time??
 OMG i love them...
 The flame above looks pretty big/out-of-control but I promise they were pretty mellow (I tipped this one on its side to get a little more of the oil up in there for the best picture... only it turned out a little pyro-ie... ... ... hooray FIRE!!!)

I dont know if you noticed in our previous "lighting" post, but we had them out and lit for the little get together we had last week.
They worked perfect and I'm happy to report I didnt get bitten ONCE by any evil 'sequitos!! (probably because I was wearing jeans, boots, and a long sleeve shirt, but we'll go ahead and award it to the wine tiki torches)

So there you have it!!
Do you guys like em? Would you ever try something like this? Again, if you like em, check out that website and try em out!!


I would love your feedback!
-Samm


Like us on Facebook

Little House in the Big D

Flickr Images