
SHWING!!! Ugly Desk turned Pretty Sage
10:59 AM
Ok, Ok, OK, I know there is NOOO excuse for how long its taken me to get this post up, but I do have a pretty good side story... I was at playing with toys all last week... seriously! For those of you who dont know, I am a sales rep for several awesome toy companies and work to make sure they get the best placement in the mass market. Last week was the NYC Toy Fair where the latest and greatest toys for Christmas are previewed. Every year, new inventions and games continue to surprise me and I love knowing about it all 10 months before everyone else... hehehe...Well, there was that, AND the awesome cold I caught on the plane ride back (p.s- the person who invented "Cool Touch Kleenex" should be granted sainthood. Seriously, Im about to buy stock in their company).
ANYWAY, let the trumpets sound! I am ready to reveal the project I've been working on from my Garage Sale Jackpot back in November. Remember this guy??

Yea.. thats a lot of old, painted, stained, sad, sad, sad wood...
So, I decided I was going to give this guy its best chance at a future... I needed to totally refinish him.
Step 1: strip all the handles...

Oh, but good news?? This piece is old, solid wood!! You know how I know?? Look at the bracketing on the side...

After I stripped the handles, I had one major problem glaring me in the face... the sides of the desk.


Even on the other side...


Unfortunately, it turned out like this...

So next step?? Eh, I'll just rip the whole side paneling off...
SURE! A hammer sounds like a GREAT idea...

yea... THIS happened...

So after I cried, stomped my feet, cursed, attempted the hammer a second time, call Chris to complain, cried a little more, and sent a frownie face text message to my mom, I decided to go to Home Depot... aka a 5 minute drive away (did I mention how much I LOVE where we live???)

I knew I wanted to get something to replace the siding... thin, light weight, easy to work with... I found this plyboard for about $.67 a sq ft


After I put everything on, I calked the sides and used some tape to hold it down to keep it even...


I also knew I would have also replace the inside paneling as well...


Next day? All dried and pretty!

However, I really didnt like how there was an obvious contrast between the original desk wood and the new paneling, so i decided that maybe if I framed it, it would look a wee more polished.
So... back to Home Depot I went... and for $0.36 I found my answer...

And again, because of my awkward should-be-mens-cologne smell, I found myself at the cutting table... probably standing way too close and inhaling like I was in a flower nursery.

Sorry for the blurry picture, I was probably inhaling way to many wood chips to make sure I had my camera in focus.... Now that I think about it, Im kinda surprised I didnt get kicked out of Home Depot.... point for me!
Went home to try em out... bam... they are going to look GREAT!


Eh, we'll get back to that...
Anyway, because this desk as seen better days, it needed a hardy sanding... so I used a really low grit... 40


I then planned a quick trip to Hobby Lobby to get a "real" stencil which only runs about $10 after their 40% off coupon.
$72.56 later.... I came home with this...


Soooo here is the stencil pattern I chose.


I chose a paint color that we already had in the house... Silver Sage by Restoration Hardware... honestly, it goes with everything. ESPECIALLY white, so I figured it would be perfect for this desk.


I then tried to frame it with the siding I found at the H.D...


Once removed?...

Next step... now that I was soooo close... was a WATER based Polycrylic sealer. VERY important that its WATER based... oil based will turn yellow... and NO BODY wants that.

After a couple coats, I brought him inside and set him up to see how pretty he was...


Wow I'm loving the stencil!!
Up close, even better...


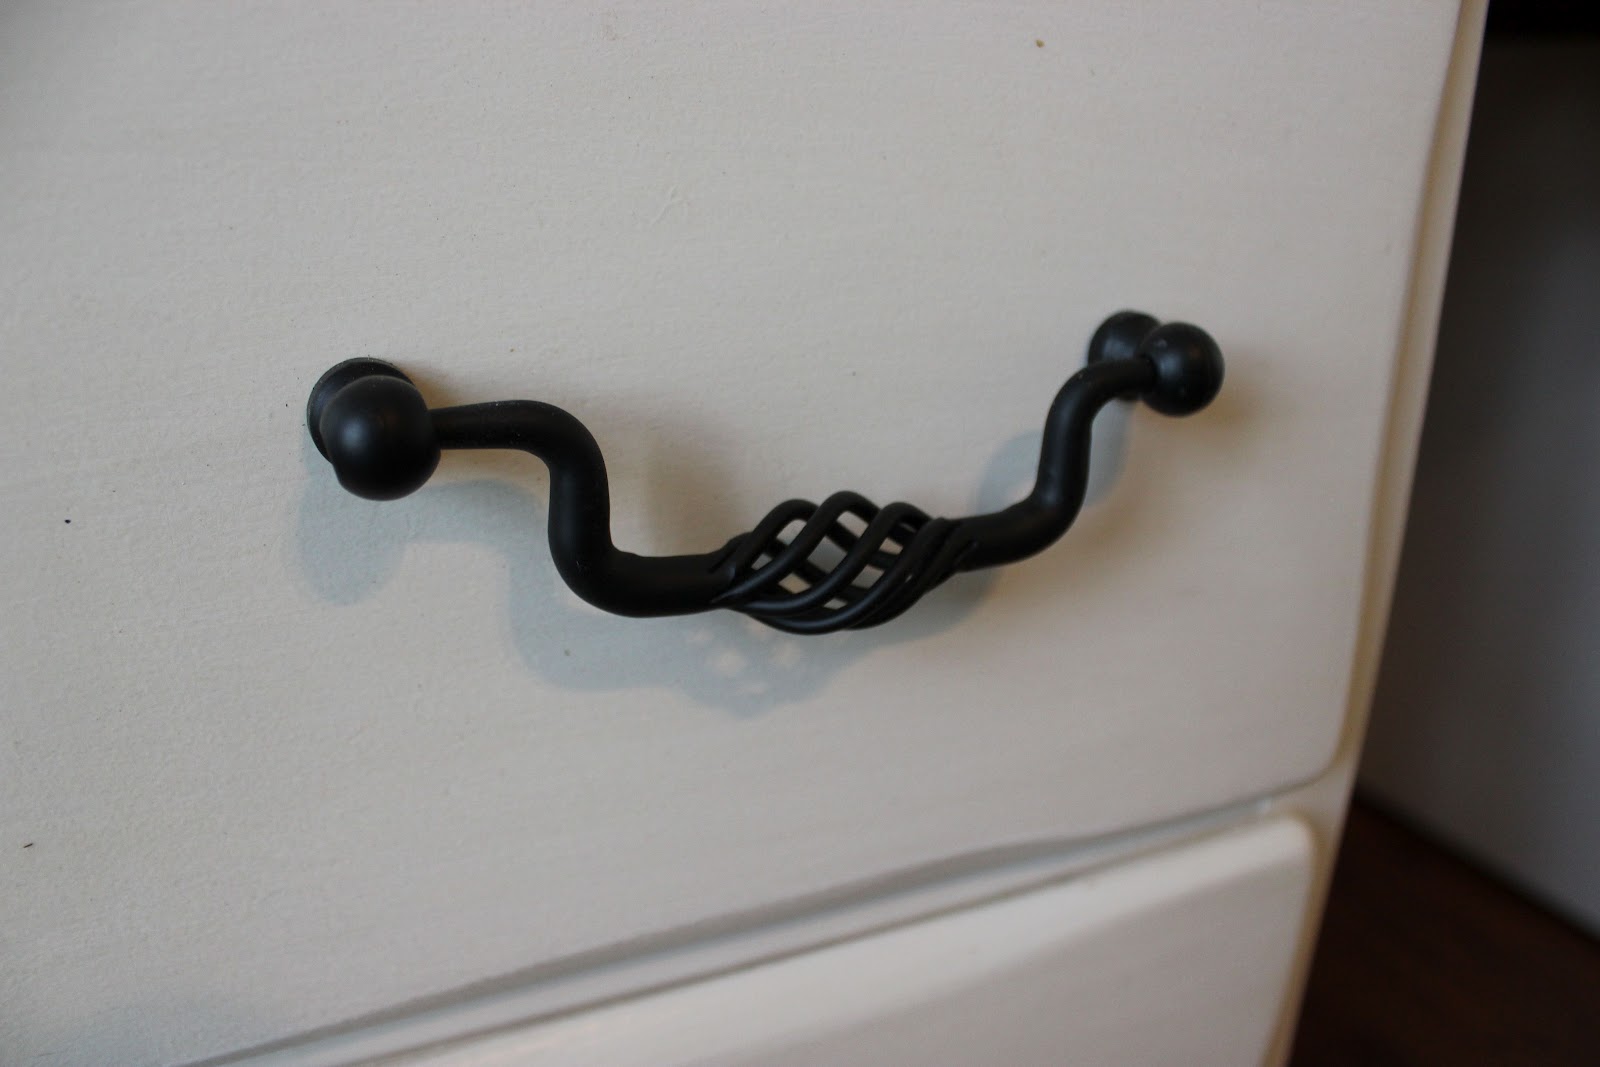
And the handles? I mean come on! If we were in a Wayne's World movie, this is where they would enter "SHWING!!!"...

Here's the awesome before/after to give you a good side by side.... Although I wish you could see the destructive sides that I took a hammer to....

I would LOVE you to leave a comment!!


109 comments
I LOVE it!!! Oh my gosh, what a transformation!!! The stencil is gorgeous, and yes I agree that it was a brilliant move to paint the feet in the silver sage. I'd never know that was the same desk; awesome job!!
ReplyDeletebtw I've read about Beyonce and it was life changing. ;)
I love it too! The colors are perfect and the stencil is too! so creative!
ReplyDeleteSamm, YOU are my entertainment! You crack me up! I feel like I'm reading a blog that has just won an HGTV show for most clever and creative restorer! I, too, love the smell of sawdust - it smells like toast! But, enough about me ... your desk redo is amazing! I love the subtle color you used against the white, love your knobs (never would have kept the old wood ones) and it's genius how you restored the sides and framed them in! You ROCK -- if you didn't have such an awesome job, I would tell you to figure out how to do this for a living. But, keep the cool job you have and do this for fun and to entertain and amaze me! Great big hugs, Sue
ReplyDeletep.s. Where do I read about Beyonce?? (hmm, Schwing - need to figure out how to work that into my vocab!)
Here's the link for Beyonce! http://thebloggess.com/2011/06/and-thats-why-you-should-learn-to-pick-your-battles/
DeleteI just read it again to make sure that it was still funny... and I think I broke a rib.
Enjoy!
that was a ton of work but it looks amazing!
ReplyDeleteSooo pretty. I love the stencil on the side, it just makes it extra special.
ReplyDeleteAnd cool touch Kleenex? You just blew my mind (pardon the pun). I have to buy that right now before anyone in my family gets sick again.
Welcome back!
Jessica
haha glad you liked the stencil Jessica! And yes, I hope Cool Touch Kleenex changes your life as much as it changed mine... ... ... thats a sentence I never thought I would write... wow. ANYWAY! Thanks for stopping by!
DeleteHi Samm!
ReplyDeleteYour desk turned out amazing!! Thank you for participating in the blog hop! Wishing you much success in your bloggy endeavors! New follower:)
Kelly
www.livelaughrowe.com
hey Samm! thanks so much for your sweet comment on my blog :D the baby wreath didn't take all that long to make really... maybe 1/2 hour to wrap the wreath (it was a little smaller than standard "wreath size"... maybe like 10" diameter instead of the typical 12"?) anyhoo, and the flowers were pretty easy too- they're all basically cutting out the petal shape and then sewing the petals together, so maybe like 1 hr for all the flowers... I made the whole thing while watching some of my fav tv shows ;) hehe... the longest part was wrapping the word- probably over an hour for just that! If i did that again, I would have used a thicker yarn to make it go a bit faster!
ReplyDeleteAnd by the way, LOVE this post!! the before and after are truly spectacular!! "sanding, the botox for furniture" <-- LOVE that! hehe, so true... sanding covers a multitude of sins :P
I love the way you re-did it!! Your excellent way of teaching each step was very accurate and sooooooo what I would have done!!! You made the piece look brand new. I have not had such a good time reading about a project in so long.....I am ready to take on the world......ok, maybe just my bedroom.
ReplyDeleteI think changing the handles was a smart choice. I give it 2 thumbs up :-)
Thank you for all the sweet comments! Im glad you enjoyed reading it! Im still kinda new to the whole blogging world so encouraging words are much appreciated! You're blog is adorable as well! I'm a follower
DeleteThis comment has been removed by the author.
ReplyDeleteThat is a fantastic makeover...love it. Don't you just love these blog hops where we get to find and meet new blog friends? Glad I found you. I'm a new follower and I would love if you stopped by and followed back, so we can stay connected. Lori
ReplyDeletedefinitely will do! Thanks Lori!
DeleteGreat job. I just redid a desk and didn't even go to this extent and it took forever so great job! i love it. love your newest follower bridget
ReplyDeletewww.bridgeywidgey.com
Beautiful work Samm. Mom and I are sitting here admiring your work. Love the stenciling and the colors. Do you sand all of that by hand? A woman of many talents....
ReplyDeleteLove it! I am your newest Linky Follower and thanks so much for linking up to my Toot Your Horn Tuesday!
ReplyDeleteDid you really say "shwing!"??? LOL!!!! {Mother of 2 sons in their twenties here.} Love this dresser and all of your pics. What a boatload of work...but worth it!! I have that same stencil and used it on an old little piece that is now a side table in my living room. I'm your newest follower. Party on. ;)
DeleteOMG Samm .. it turned out AMAZING!!!! My eyeballs almost popped out when I saw the 'after'. And oooh how FUNNY you are (I confess I sometimes zoom looking through pictures but ur funny 'terminology' def caught my attention. Hmm, I would be a bit careful being tooo close to the Home Depot guy - they may start posting a WARNING sign with ur photo ; ) Ok, I am heading over to add u to my Google Reader so I can stay in touch! Oooh, ps. I love how the stencil u choose looks like your blogsite background - it was 'meant to be' :)
ReplyDeleteAda, Thank you so much for all your kinds words! I'm definitely a bit of a paz when I'm working on something so I'm glad my weird little quirks come across on my blog! And yes, I too am a little concerned about getting a warning sign with my picture on it outside Home Depot. I seriously have dreams/nightmares where I'll wake up thinking they closed the one by our house... it's sad; yet soooo addictive!
DeleteINCREDIBLE!! Just wanted to say that i spent way more time than I intended exploring your lovely blog. Stopping over via the blog hop! So nice to meet you!I'm a new follower :)
ReplyDeleteLindsey
outofalabaster.blogspot.com
Hi Samm your desk turned out lovely and I laughed all the way through it because it was funny and it sounded just like me when I'm doing a renovation. I love the way you framed the stencil and it made it stand out a lot more. Congrats it turned out beautiful. Thanks for stopping by my blog and leaving kind words. I'm a new follower on LF.
ReplyDeleteI absolutely love it! You did a fabulous job and I adore the stenciling! I am following you back :-)
ReplyDeletewow, it's beautiful - great job!
ReplyDeleteluff the desk turned out awesome i definitively think he is a she ;)
ReplyDeleteI am loving this desk, and I love a funny chick. So I'm a new follower!!!
ReplyDeleteThat looks fantastic. What a nice tutorial...I appreciate you taking photos all along the way. It's fun to watch the transformation. :) Megan
ReplyDeleteI Love it! Fun to read about your journey as well!
ReplyDeleteDanielle
Love this desk -- it is so amazingly nice -- excellent job. I'm also in love with some of your other furniture redo's and am going to have an awesome time to exploring them. I'm your newest follower!
ReplyDeleteI love your desk! Great choice of the stencil on the side. Looks awesome. I like the shutter on the top too :) Linking up from our delightful home hop. Newest follower. Check me out if you get a chance ;) -Kim http://bbunchmama.blogspot.com/2012/03/diy-start-being-awesome-sign.html
ReplyDeleteNo one would believe that was the same desk if they hadn't read your tutorial. It is an absolute beauty!
ReplyDeleteOh my gosh, it is such a doll of a dresser! GREAT rehab job. I love the colors. And you'd never know it- it just looks custom. Great job.
ReplyDeleteOh I adore your old/new desk! I too love the smell of cut wood. I keep cedar blocks in my drawers. :)
ReplyDeleteI hope you'll stop by my blog. I am hosting a giveaway for a $50 Kirklands gift card.
This is an amazing transformation! Newest follower here.
ReplyDeleteVery Nice!!!! You did a great job!!!!
ReplyDeleteBeautiful! You did a wonderful job- and it was highly entertaining to read! :)
ReplyDeleteI'm a new follower-
Valerie- www.occasionallycrafty.blogspot.com
labor of love.
ReplyDeleteBeautiful!! It looks amazing. I found you on Polly Want A Crafter and I am a new follower.
ReplyDeletewhat a fabulous save! it looks amazing after all that hard work!
ReplyDeleteGreat tutorial! I have a desk very similar (my first redo piece). It has damage on he sides just as this and I've been stuck not knowing exactly what to do about it. Thanks so much. I also love the colors you chose.
ReplyDeleteOh my what a transformation. The stencils add a lot to wrap up thr piece. Great job!
ReplyDeleteAmazing refinishing job....you did a fantastic job....no one would believe it was the same piece of furniture....great detIls! Found you at Trendy Treehouse......NeeCee at pinecreekstyle.blogspot.com
ReplyDeleteYour newest follower......
What an unreal transformation. I love it all and your tutorial is wonderful. Gorgeous desk. Thanks for joining TTT. Hugs, Marty
ReplyDeleteLooks great and it matches your blog:) New Linky follower.
ReplyDeleteFrom one Texas girl to another-- love it! So glad you shared your desk on "Cowgirl Up!". It looks amazing!
ReplyDelete:) Samantha @ Crafty Texas Girls
This is an amazing makeover! {I'm in the middle of a dresser re-do right now and I am so not patient enough for all the sanding and prep you did...} I {heart} Home Depot too, just went there last night like 15 minutes before closing! I am so glad I found your blog, new follower via GFC. Can't wait to see what other projects you have coming our way! You are seriously hilarious too. Love it!
ReplyDeleteThis is AHHHHMAZING! Fantastic job, looks beautiful!!
ReplyDeleteBarbara
http://chase-thestar.blogspot.com/
Thanks for linking to Take-A-Look Tuesday - you were featured today!
ReplyDeleteMandy, www.SugarBeeCrafts.com
lovely desk and you had me laughing I didn't even get to read about Beyonce I'm your newest fan
ReplyDeleteWow wow wow! What an amazing transformation! and I so enjoyed reading the whole post about it! Laughed every time you went sniffing wood cutting!! :)
ReplyDeleteAwesome Job Samm!
Thanks for linking to a Round Tuit!
Hope you have a fabulous week!
Jill @ Creating my way to Success
http://www.jembellish.blogspot.com/
Thank you Jill!!! So glad you liked it!
DeleteThanks so much for linking to Toot Your Horn Tuesday!! Your creations truly inspire me and I look forward to seeing them every week. Can't wait to re-do something. You make me think I can do it!!
ReplyDeletegorgeous! love the colours.
ReplyDeleteGreat job you put a tremendous into this PROJECT holy mackerel! Love the stencil too! Stop by for my giveaway!
ReplyDeleteBeautiful! You would never guess it had such a nasty past! Thanks for sharing!
ReplyDeleteGoodness!! I know you went through so much work and aggravation but the results are absolutely amazing!! I love this desk!! It really is a work of art and Congrats to you on such an amazing transformation!!
ReplyDeleteHugs,
Debbie
My goodness I never ever would have thought to do that, how clever! I seriously would have took it to the curb after dealing with the siding and I'm speaking from past experience lol. Wish I had known, sigh:) I would like to invite you to link up your work of wonders at my cheap finds and transformations party if you'd like.
ReplyDeletehttp://bacontimewiththehungryhypo.blogspot.com/2012/03/anything-goes-linky40-achoo.html
Have a great weekend!
Just One Word.........BEAUTIFUL !!!
ReplyDeleteWOW!! You did an amazing job!! I love the stencil and the colors are prefect!!! Love it:)
ReplyDeleteThanks so much for linking up. You are definitely getting pinned this week:)
ReplyDeleteWOW Thanks Latoya!
DeleteLove, love, love it!!!....and the story too. It turned out awesome!
ReplyDeleteThanks for linking it up @ Creatively Living!
--Katie
I'm going to be featuring this on my FB page tonight :)
Delete--Katie
Thanks so much for the feature Katie! Glad you like it!
DeleteI adore this! The colors are perfect and I love the tongue-in-cheek way you tell the story. I'm your newest follower and I'm so glad you linked up this week!
ReplyDeleteIncredible transformation! Sanding truly is botox for furniture!! :) thank you so much for linking up to our Uncommonly Yours link party! Bonnie ;)
ReplyDeleteTurned out great...kind of matches your bloggy blog! Thanks for linking up at Giggles, Glitz & Glam. Hope you will continue to link up each week. Loving some of the things I'm finding on your blog.
ReplyDeleteStopped over from Sugar and Spice blog hop. What a project this was. Turned out great~
ReplyDeleteGreat job! Love the way she came out. And yes you were right to ditch the wooden handles. Too chunky. The stencil on the side adds a little oomph to the desk. Very nice job. If you get chance, please visit my blog and check out my "peacock desk". I did a stencil as well. Love to hear what you think!! Thanks.. Beth
ReplyDeleteLove this post and LOVE how the desk turned out! We'd be so happy if you linked this up at our party! http://housewivesofriverton.blogspot.com/2012/03/riverton-housewives-round-up-8.html
ReplyDeleteWow! This is really great and I totally love the way you took us through your steps! You just picked up another follower! :) Found you through the Tuesday Trash to Treasure from Sassy Sites.
ReplyDeletewell, WAYYY nicer than before. You got yourself a nice new desk!
ReplyDeleteI'm kind of jealous that you only live 5 minutes from HD! Your desk turned out amazing. I think I have to feature you again this week! The other readers might get jealous, but I love this desk. I hate working with peeling veneer and have used that same board and paint-can hold-down technique that you used. Very effective!
ReplyDeleteThat would be awesome! Thank you!!
DeleteOh my goodness...I'm not sure which I love more, this amazing transformation, or how much your post made me giggle! I love your 'scientific methods' and your writing style. Meanwhile, did it creep out the Home Depot guys when you took their pic? Or were you so stealthy they didn't know? I love the smell of fresh cut wood too...mmm! Anyway, thanks for sharing at Shine on Fridays; featuring this tomorrow at One Artsy Mama!
ReplyDeletehttp://oneartmama.blogspot.com
I am so glad you linked this up to y Drab to Fab party!! Wanted to let you know I am featuring you this week!
ReplyDeleteThis week's party is up, so I'd love to see more of your great stuff!
http://www.amynjesse.com/2012/03/drab-to-fab-link-up-8-features_15.html
Have a great one!
Amy @ Sugar and Spice
Thanks so much for linking up to LaThrifta's Cheap Finds and Transformations last week! You were awarded the superstar badge of honor! You can pick it up here if you'd like and I hope that you'll party with us again:) Have a great weekend! http://www.thescottscrib.com/2012/03/lathriftas-cheap-finds-and_16.html
ReplyDeleteThis is stunning! Stopping by from One Antsy Mama blog hop.
ReplyDeletehttp://craftyandcookingmomma.blogspot.com
I was late for work today! Lost track of time surfing the LHBD website.
ReplyDeleteSuch fun stuff!!!!!
Holy smokes!! This is GORGEOUS!!!!!
ReplyDeleteLove, love , love. I'm glad I found you from Pinterest. Now you have a new blog stalker :) JK
ReplyDeleteAmazing!! I keep finding one awesome project after another! I love your humor and how you take us through the process step by step! Pinning ya! :)
ReplyDeleteWow! I am really impressed. It has even inspired me to think that I might be able to do this with a similar desk we own. It was a $10 garage sale "treasure" that needs lots of help. Thanks for your inspiration!
ReplyDeleteYou've inspired me to go a little further with my redecorating. Great job on the desk.
ReplyDeleteWow, looks fantastic! Did you apply anything to the top to seal it and give it that smooth surface?
ReplyDeleteYes I sealed it with a water-based Polyurethane. If you plan on sealing a surface with a poly coat, make sure you use WATER based when covering paint and OIL based when covering a stain... if you use a oil-based sealer on a painted piece, it will start to yellow over time (I had to learn that the hard way)... I hope that helps!
DeleteI really like the transformation. I also like how you aren't perfect in your projects. I mean this in a awkward good way. I am trying to save up money currently so I can start doing projects like this for my home. I am a stay at home mom, (who use to work non stop day and night) have a wonderful 1 yr old son. He is SO CUTE! Anyways, it gave me confidence to see that you don't have to be perfect, you don't have to be a pro. You can make mistakes and it's okay. I really appreciate your cuteness, you make it fun to read and exciting to see the results. PLEASE continue posts your projects and tutorials. Talk to you later.
ReplyDeleteAshlymay, That you so much for all your sugar-sweet words!! Plus, BRAVO for being a stay at home mom... you guys are my heros! Seriously!... And yes, mistakes are totally part of the process. By NO MEANS am I a professional or even pretend to be, but it is a LOT of fun experimenting with little ideas that pop in your head. They might not always work, but when they do its one of my favorite feelings! More projects to come I promise!
DeleteI LOVE that you go step by step WITH PICTURES. I love a lot of bloggers work but as a beginner, when they go thru and only show me like a pic every 3 steps, it's aggravating not understanding it. I also love that you tell us the name of the products you use, the color and by who and where! great job really. I'm about to go try this project on a dresser. by the way, where did you get the handles from?
ReplyDeleteYou have a good sense of DIY... and I sure learn a handful tips and tricks here... Awesome!!
ReplyDeleteHow in the world do you come up with these great project??? I have seen a few of your "refurbish" type project and I have to say I am impressed! Do you ever sell your refurbished stuff? I think you could make a killing on that stuff! My great uncle would do stuff like that and have a huge yard sale once a year to sell all his refurbished stuff. Or you should teach classes on it. I would take a class from you on how you do this. :)
ReplyDeleteThanks for the tutorial!
Ali
(of Emma Squared Designs)
I love what you have done, even reading thru your highly techical techniques, LOL was very cute. I love what you did and you are an inspiration to me, because I have always wanted to attempt something like this, but I just dont find the nerve to actually commit. I am new to your page, so I hope to find more that you have done! Thank you for sharing your experience,
ReplyDeleteBravo
Great Job!Bravo!Thanks:)
ReplyDeleteWow...that was some aggressive project! Way too much for me to attempt...I'm a fan of simple, quick and easy voila! I do admire your ambition and it sure did turn out great!
ReplyDeleteLove the project, where did you find the new handles?
ReplyDeleteSamm, love your blog. First one I've ever really followed. I'm going through a difficult time now and you make me laugh-out loud even. That worm snake you were holding was huge-I thought I had some big worms in my garden, it was kind of grotesque in a way-sorry, King Worm. Everything I have read so far has really been a great success, and I know that Chris is a great help to you too. Pretty soon Baby Brooks will be handing you glue sticks as you need them. Like I tell my daughter, although sometimes the days when they are little can be rough and seem so loooonnnng, it's amazing how swiftly the years actually go by. You are a special person and are gifted with a way with words. (Did I tell you I am a retired teacher and administrator?) Before long, I bet we get to read a book written by you. Shelley T
ReplyDeleteHi buddies, it is great written piece entirely defined, continue the good work constantly. TreeServiceinGreenville
ReplyDeleteHurrah, that’s what I was trying to get for, just what a stuff Presented at this blog!! Thanks admin of the site. Best Limo Service Los Angeles
ReplyDeleteI don’t like to give comments mostly on the blogs but your blog is one amongst the blog that I was compelled to give nice comment. Hmmm!!!
ReplyDeletehttp://www.stewartlangleyproperties.com/
I am very contented to get this blog! I will bookmark this webpage and share this with my friends too. home security systems
ReplyDeleteThank you so much for your all great explanation, I liked reading this. umrah package
ReplyDeleteHi Samm! I noticed you said you used Polycrylic to seal it and coat it. About how long did you wait before using it the desk? And does it scratch or crack?
ReplyDeleteReally it is quite edifying article just that I was on the lookout for. blog post service
ReplyDeleteEvery week-end I used to pay a fast visit this site, because I’d like enjoyment, because this web site conations certainly fussy material.who do you pay a deductible to
ReplyDeleteCool blog! I found this blog very useful; have learned lots of thing here.
ReplyDeleteWePayTheMost.co.uk
Waow man! You know you have helped several people including me, thanks for sharing with saving our never-ending hours of browsing…
ReplyDeleteCOR Residential Real Estate Atlanta
Hmmm I have got real pleasure from your blog and also Derived a benefit from this information you imparted to us. Thanks hutchinson island fl real estate
ReplyDeleteIt’s a good fantastic blog write up, the way you depicted details here, all readers can understand easily. Health Insurance Gainesville
ReplyDeleteGreat job! The desk looks beautiful. Makes me want to try my hand at making something ordinary look wonderful. What a transformation. You are so clever! (And amusing!) thank you for Cheering up my day. Xx
ReplyDeleteComments make my heart happy... and I read every ONE of them... thank you so much for taking time to make my day!